
Are you tired of the loud, disruptive noises from your sump pump’s check valve? PumpSpy’s Silent Check Valve is the solution you’ve been waiting for. This valve is designed to eliminate water hammer noise, providing a quieter operation for your sump pump system. In this blog, we’ll guide you through the installation process, so you can enjoy peace and quiet in no time.
Step 1: Remove the Existing Check Valve
To begin, uninstall your current check valve from the discharge pipe. Make sure the system is turned off to avoid any unexpected water flow while you work.
Step 2: Measure the Discharge Pipe
Ensure that there is a 5 and 1/8-inch gap in the discharge pipe for the new silent check valve to fit properly. If needed, cut the discharge pipe to create this gap. Accurate measurements are crucial for the check valve to function correctly.
Step 3: Connect the Silent Check Valve
Take the PumpSpy Silent Check Valve and position it between the two ends of the discharge pipe. Attach the rubber couplings on each end of the valve to the discharge pipe to create a secure connection.
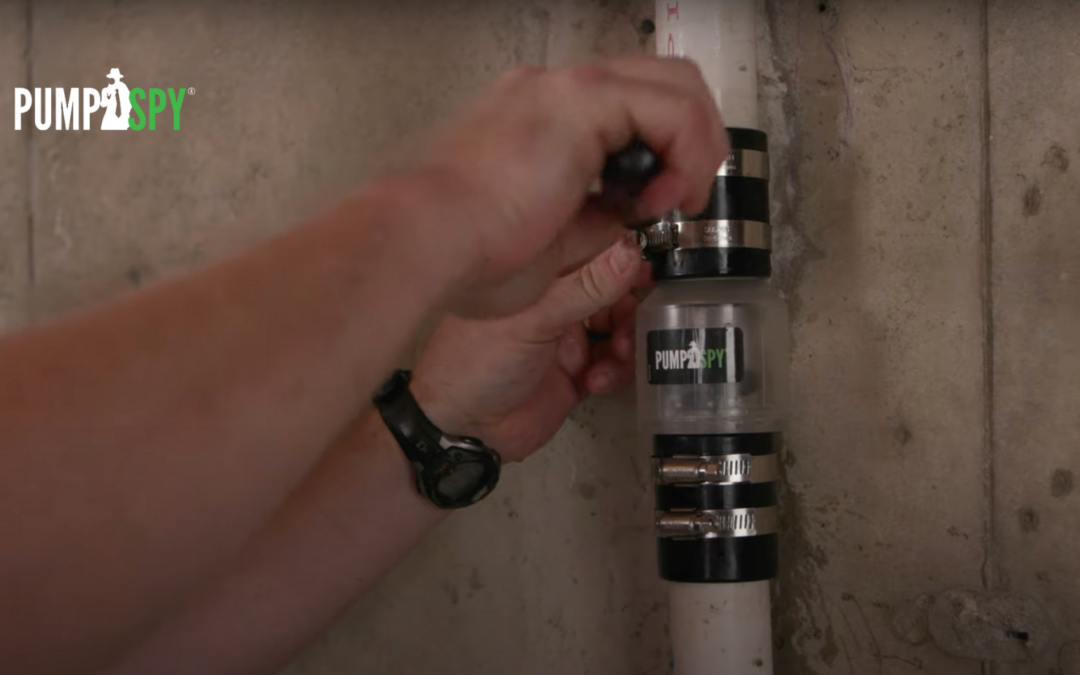
Step 4: Tighten the Hose Clamps
Using a standard screwdriver, tighten the hose clamps on both rubber couplings. This will ensure that the silent check valve is tightly secured to the discharge pipe, preventing leaks and ensuring smooth operation.
Step 5: Enjoy Quieter Performance
With the PumpSpy Silent Check Valve properly installed, you can say goodbye to water hammer noise. Your sump pump will now operate more quietly, making your home more peaceful.
Final Thoughts
PumpSpy’s Silent Check Valve is the perfect solution for anyone looking to eliminate the noise caused by traditional check valves. With a quick and easy installation process, you can significantly reduce the loud water hammer sounds and enjoy a quieter home environment.
Ready to make the switch? You can find the PumpSpy Silent Check Valve here. Start enjoying silent sump pump operation today!